I’m republishing this old post in English, thanks to the outstanding help of my friend Mary Jo Barber, who kindly translated it for me. She is a professional translator, so she can deal with all kind of texts from Spanish to English, even the freakiest ones as you can see 🙂 So if you need anything properly translated, don’t doubt it, you have the link above to contact her. Thanks a lot Mary Jo!!
____________________________________________________________________
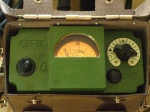
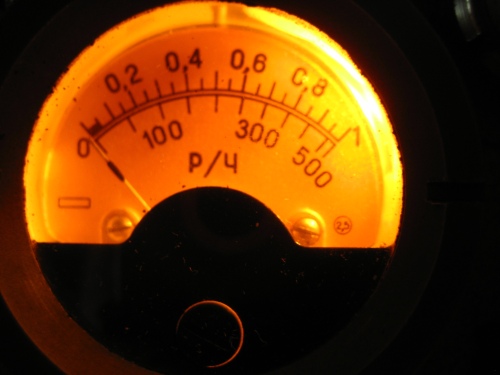
The DP-3 is a Soviet radioactivity meter from the 1960s. It works using an ion chamber, meaning that it is not a Geiger counter, although the two are often confused.
This interesting piece of equipment has fallen into my hands and everything about it, both inside and out, is reminiscent of an era that was not so long ago but was very different: the Cold War, when two massive ideological blocks, both with imperial ambitions, confronted each other more or less openly all over the planet, which had become their geo-strategic chessboard. During this time, which ran from the end of World War II to the fall of the Soviet regime, these devices were neither a rarity nor an extravagance. The possibility of having to use one at some time or another was very real: nuclear war was a threat that hung daily over the lives of people all around the world.The DP-3 was primarily conceived to form part of the equipment of military helicopters and armoured vehicles. As already mentioned, the mechanism by which it detected ionizing radiation was the ion chamber, rather than the GM (Geiger-Muller) tube used in the better-known Geiger counter. In practice, this means that it detected only serious levels of radiation, as it was far less sensitive than a Geiger counter. Its range goes from 0 to 500 roentgens per hour. In other words, if you have a DP-3 by you and it starts to blink … run!
For a very broad idea of what radioactivity levels mean when measured in roentgens, we can establish a scale going from environmental radioactivity levels (0.010 to 0.05 mR/h) and the measurements taken at the Chernobyl 4 reactor after the 1986 accident (up to 15,000 roentgens per hour). Anatoly Andreyevich Sitnikov, one of the engineers sent to inspect the reactor shortly after the explosion, received a dose of some 1500 roentgens – his remains are interred in a lead casket.
As it happens, one of the first things the army sent to Chernobyl to evaluate the situation was a DP-3. At least as far as we can read in this article (Russian):
The situation at the plant by the end of April 26 was still unclear. Therefore, on the night of 26 -27 April, Colonel-General VK Pikalov organised a patrol to measure radiation levels at reactor 4, at the plant in general and in the town of Pripyat. A BRDM-PX special armoured vehicle circled block 4, measuring radiation levels, which in some places exceeded 500 R / hr (the limit of the DP-3).
These days, more modern units, such as the sievert or rad, are used to measure radioactivity, as they prove of greater use in understanding the real effects of radiation on the human body. This may be why I have not yet been able to find sufficient information or equivalences regarding the effects of exposition measured in roentgens. In the case of the sievert, the most widely-used unit nowadays, I found this interesting table.
According to the metal plate on the probe, my DP-3 was made in the USSR in 1964. It had been knocked about a bit and was quite scratched and dented. The first thing I did was to run it over with its little brother, the DP-5, just to make sure it wasn’t still “hot”. 🙂 You can never be too careful!
But no: the DP-5V ruled out any fantasies about the device’s back story. We detected normal levels of radiation for this area (around 0.025 mR/h), with the odd peak of up to 0.05 mR/h. Nothing to worry about 🙂
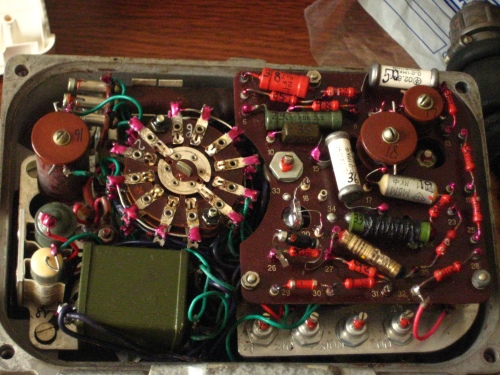
Next, a bit of cleaning, after which we took a look at the guts to see if any parts were missing.
.
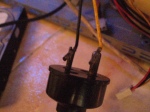
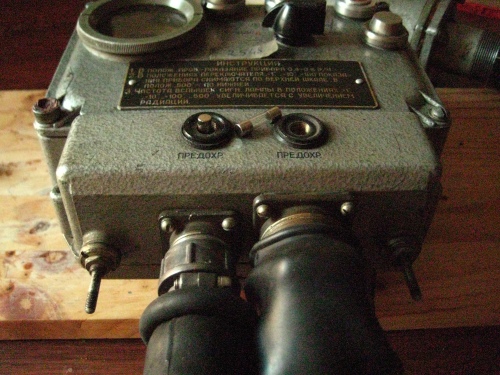
The inside is very different to the outside. The parts were clean, oiled and carefully numbered by hand, one by one. There were no burns or missing solder. All that appeared to be missing were the two fuses reached from the lower part of the front panel. After a long search (there doesn’t seem to be much information about this model available, and what I could find was in Cyrillic), a photo I found in a chat room thread about a later version (the DP-3B) put me on the right track: it appears they are 2-amp fuses. The roentgenometer runs on 12 or 26-volt direct current. Two switches under the metal lid of the bottom part are used to select the voltage. The standard power source for any PC gives us 12 volts, so I ran a yellow wire from one of the internal connectors to one of the pins of the DP-3’s plug, connecting the other to a black earth wire.And now all that was needed was to test the fuses. The ones that fit into the space are 5 x 20 mm. I fit them in, screwed on the covers, turned on the PC, switched the selector to Вык and …
.
It works! The light goes on and you can hear the whine of the oscillator. The needle jumps sharply and returns slowly to zero. Just as well 😀There’s not much else to do with it right now, but it’s really satisfying to see this amazing piece of 20th-century analogue technology come to life, after who knows how many years of ill treatment and abandonment in some dusty corner. How many of our mobile phones and high-tech gadgets will still be working after 10 years? And after 47? UPDATE
The front plate reads:
ИНСТРУКЦИЯ.
1. В ПОЛОЖ. “ПРОВ”. – ПОКАЗАНИЕ ПРИБОРА 0,4%0,8 Р/Ч.
2. В ПОЛОЖЕНИЯХ ПЕРЕКЛЮЧАТЕЛА “Х1”, “Х10”, “Х100” ПОКАЗАНИЯ ПРИБОРА СНИМАЮТСЯ ПО ВЕРХНЕИ ШКАЛЕ, В ПОЛОЖ. “500” – ПО НИЖНЕИ.
3. ЧАСТОТА ВСПЫШЕК СИГН ЛАМПЫ В ПОЛОЖЕНИЯХ “Х1”, “Х10”, “Х100”, “500” УВЕЛИЧИВАЕТСЯ С УВЕЛИЧЕНИЕМ РАДИАЦИИ.
With the help of Google and common sense (sorry in advance for any errors or inaccuracies) this means more or less:
INSTRUCTIONS
- In “XX” position – Use scale from 0.4 to 0.8 R/h.
- In “x1”, “x10”, “x100” positions, readings are taken from the upper part of the scale. In “500” position – from the lower part.
- In positions “x1”, “x10” “x100” and “500”, the light flashes more frequently as radiation increases.




Deja un comentario